Knowing how to sew is a great life skill to have. It can help save your favourite jeans when they get a hole in instead of having to throw them out. If you want it to, sewing can become a fun and useful hobby and learning the basic stitches is a great place to start.
We understand that most people start with a needle and thread when learning to sew; however, if you’ve mastered that and looking for a new challenge, you can try a sewing machine. Further down the blog, we’ve explored some more intermediate level stitching styles for you to try.

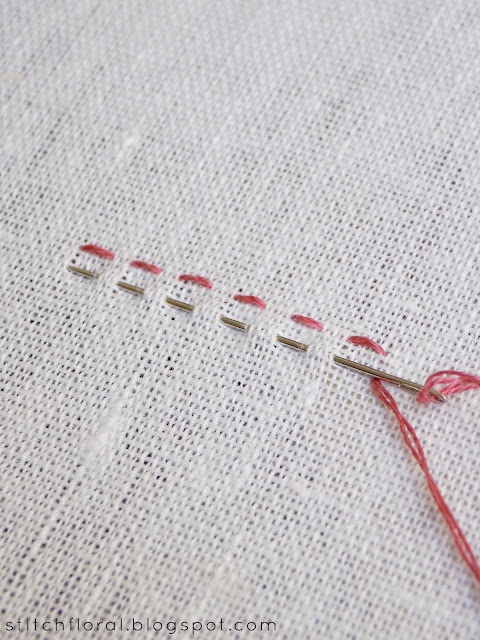
Image credit; https://stitchfloral.blogspot.com/2018/01/running-stitch-tutorial.html
Running Stitch
This is perfect for beginners as it's the most basic and easiest to master. If you have any experience with sewing, you’ll likely know how to perform this stitch, but if not, you’ll be able to pick it up quickly. This stitch is great for quickly mending clothing as it connects the two pieces of fabric smoothly but strongly.
Here’s how to do it:
- Start with your needle threaded in your machine and take it to the reverse of the fabric (the wrong side)
- Once the knot at the end of the thread touches the fabric, make the first stitch by inserting the needle about one centimetre away. Push the fabric slightly in the direction you want the stitch and pull the needle all the way through.
- Bring the thread back through the fabric and repeat.
:max_bytes(150000):strip_icc():format(webp)/GettyImages-90117180-57c988d35f9b5829f4c7f414.jpg)
Image Credit; https://www.thesprucecrafts.com/how-to-baste-2977511
Basting Stitch
Similar to the running stitch, the basting stitch is simple to master. The concept is the same, but the stitch is longer. Rather than making your stitches a centimetre apart, make them ¼ inch to ½ inch apart from each other. Once you get the hang of it, you’ll find this stitch will probably come most naturally to you.

Cross Stitch
You’re probably familiar with the crafting hobby cross stitch, but you might think it can be used to create pictures and greeting cards. How wrong you are! Cross stitch is a great way to finish hems and front-facing designs. This stitch has a few more steps than the running or basting stitches but is simple once you get the hang of it. Cross stitch is as simple as its name suggests; its pattern comes from repeatedly making X’s in the fabric.
- Start with a threaded needle. Pull the thread up through the back of the fabric until the knot catches on the fabric.
- Make a diagonal stitch to the left about one centimetre away.
- Bring the needle back up through the fabric, about a centimetre backwards from where the thread went in last, and a centimetre to the left of where the last stitch began.
- Make a stitch diagonally across the last stitch, so to make an X.
- Pull the thread through and repeat.
Top Tip: For these stitches to work best, keep them loose and even.

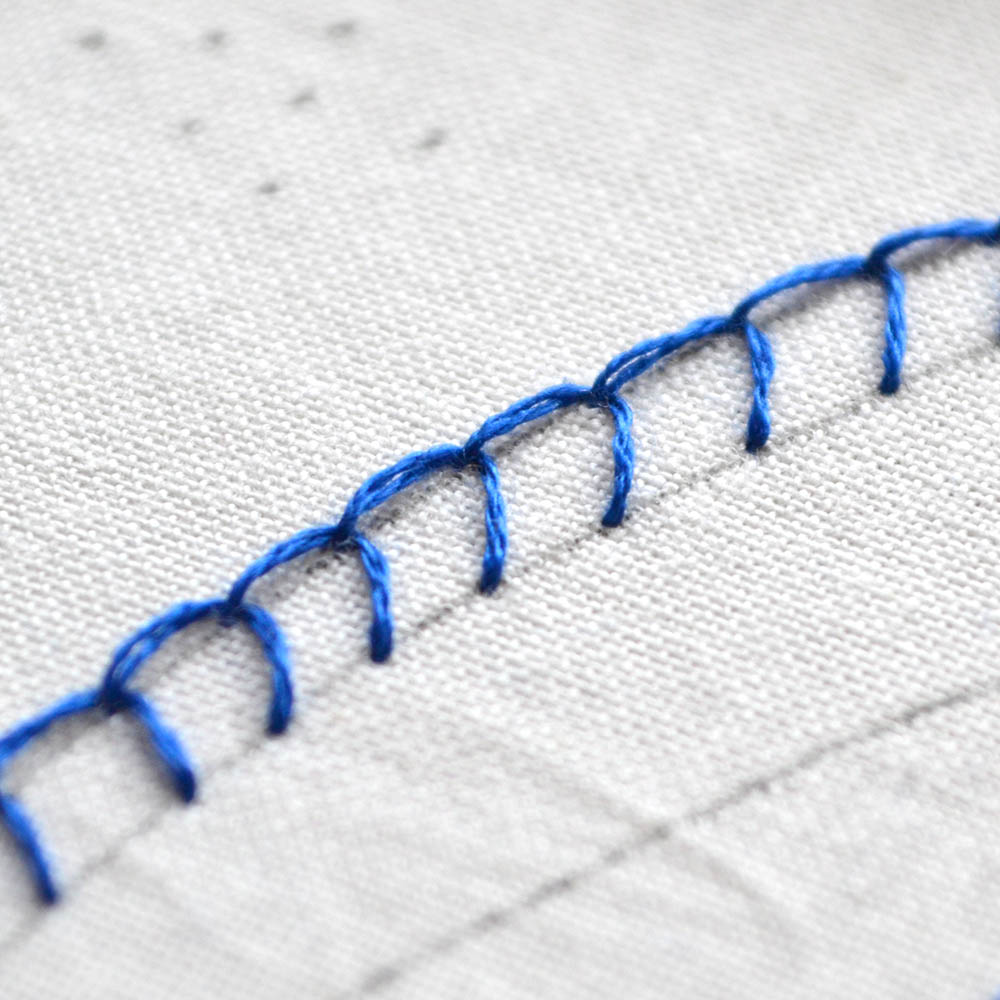
Image credit; https://pumora.com/blanket-stitch-video-tutorial-embroidery-stitches/
Blanket Stitch
The blanket stitch is a great one to try if you’re feeling a bit more adventurous with your machine. This stitch is pretty self-explanatory. Thanks to its name, it's most commonly used to finish the edge of blankets or create buttonholes. When performing this stitch on a machine, here are the steps to follow:
- Push the needle in from the back of the fabric and pull it all the way through.
- Rather than bringing the needle right through the front of the fabric like you’d expect, bring the needle through the back of the fabric again, this will create a loop.
- Pull the needle through the loop.
- Then simply repeat the first three steps.
Top tip: if you’re working on a blanket edge, keep the stitches around one centimetre apart so as not to snag the fabric.
:max_bytes(150000):strip_icc():format(webp)/close-up-of-modern-sewing-machine-presser-foot-and-needle-1258025195-d453ddc1d7cf44e08d014758488d47c4.jpg)
Image credit; https://www.thesprucecrafts.com/sewing-machine-presser-feet-2978064
Standard Forward/Backward Stitch
This stitch is perfect for when you’re ready to move on to sewing machine stitching. It’s not too complicated to ruin your confidence but still looks impressive on your fabric.
- Start by straight stitching ⅛ to ⅜ inch away from the edge of the fabric.
- BAckstitch the forward stitch over the pinned seam.
- Complete step two in reverse.
- Repeat steps 1-3 as required.

Image credit; https://blog.treasurie.com/zig-zag-stitch/
ZigZag Stitch
This stitch is great for keeping edges from fraying without going over the fabric multiple times. The zigzag effect is solid, making an excellent choice for buttonholes as well! Most sewing machines will have a pre-programmed zig-zag setting, so be sure to select this before starting.
- Adjust the machine to get the desired width and length of the stitch.
- Press the pedal slowly and guide the fabric where you want the stitch.
- Sew to the end of the fabric without stitching over the same place twice.
:max_bytes(150000):strip_icc():format(webp)/ButtonholeStitch8-bd439c1f4bac4931b8ed2227968d692d.jpg)
Buttonhole Stitch
The Zig Zag stitch is most commonly used for buttonholes. However, most machines can create buttonholes with a specific foot attachment or pre-programmed setting. Check your machine first before following these instructions.
- Start by attaching the buttonhole foot on the machine (if you have one and your machine is compatible)
- Measure and mark where your buttonhole will be on the fabric.
- Put the pressure foot down at the start of the buttonhole.
- Zig Zag stitch to the end of the buttonhole.
- Repeat the stitch in the other direction, finishing where you started before step 4.
- Take a buttonhole cutter to open the area between each row of stitches to reveal your buttonhole.

Image credit; https://www.fabric.com/blog/how-to-sew-a-blind-hem/
Blind Hem Stitch
This is a combination of straight and zigzag stitches, perfect for hemming and mending, mainly because it’s nearly invisible. This stitch is great when you need to stitch two pieces of fabric together or fold one piece of fabric together. It’s a simple yet beneficial technique to master.
- Start with two to three straight stitches
- Make one wide zig-zag stitch
- Repeat
It’s as simple as that!
At Singer Outlet, we understand that many more stitches can transform your sewing projects than included in this list. However, we think here is a pretty good place to start. If you’re using a sewing machine as a beginner, be sure to research into what your machine is capable of and give them a go!
Often machines will need a separate foot for the more advanced stitches, to check out our range of presser feet to find the one you need! For more information on stitching styles and how to upgrade your sewing skills, contact our friendly and professional team today.

